Tuesday, April 24, 2012

A few cards and stamp svg


Remember me?  I've been so very busy working on big house projects that I haven't had much time for blogging.  Today I have the day off and its raining so I thought I would make a couple of cards and participate in a couple challenges.  I made this first card for a house mouse challenge AND for challenge 82 at Cooking with the Cricut .  I used my cricut to make a standard size A2 card base in a stamp shape and used  Stampa Rosa #212-signing a card-  stamp.  The stamp has a blank card so I wrote in Dear friend,  Wish you were hear, (heart), and colored the rest with prismacolor pencils, SU ink and some Bic markers.  I love the house mouse stamps and buy them, but rarely use them because I'm not so good at the coloring part.   This quarter I went back to school (another reason I haven't had much spare time for blogging) and am taking some art classes, so maybe that will learn to color/blend and I will finally get to use them!  I'm posting the card base below as this weeks freebie svg.
Stamp Shaped Card svg


My second card is done with Wall decor and more and the third was done with little stamping up stamp and some punched flowers/gems.   Craft time is over, better do my homework and go build myself another raised garden bed (we have 6 done, 2 to go!)

Saturday, March 31, 2012

Tree trunk TY (thank you) card and svg

This weeks freebie svg is a tree trunk/lower branches, 12 leaves and a "tire".  I used a primacolor pencil to engrave the tree with a heart and TY.  The flowers are a MS punch and I used stickles in the centers of them because everything is better with stickles! Thanks for looking!

PSI_tree trunk

Thursday, March 29, 2012

Christmas Card photo shoot 2011 scrap page

I haven't done much scrapping lately (since I can't really figure out my new camera and haven't been taking many photos) but  The Shabby Shop was having a scrap challenge with $25 in product up for grabs, so I thought I'd give it a go.  This was done using their free template and their products : SugarPlum Dreams kit and Holiday Magic kit.  I think we took about 20 photos trying to get Daisy to keep that hat on and look at the camera.  Thanks for looking!

Tuesday, March 27, 2012

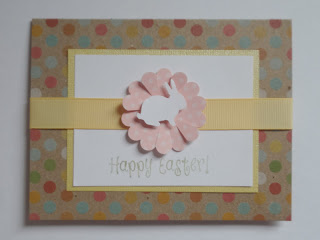
Happy Easter cards

Just a couple of quick Easter cards today.  The smaller bunny is a MS punch and the bigger bunny is from Everyday Paper Dolls (cut at 2.25 inch).  The grass is also from EPD.  Patterned paper is DCWV.  Thanks for looking!

Monday, March 26, 2012

Just my type "hello" card

What a wonderful weekend I had! I got a new stamp set (FUN), went to a vegetable gardening class (FUN), took a trip with the family to the beach (FUN), spent time working in the yard in the sunshine(FUN),  AND...I brought home 14 baby chicks !  It really couldn't have been any better!  My new stamp set is Just my type from stampin up, I love that typewriter, I will have lots of fun with that one.


So here are a couple of other weekend pictures...

The boys:


The girls...                                                                        


Friday, March 23, 2012

Cindy Loo Birdhouse treat box


This little birdhouse is just the right size for a little yellow chick and some chocolate eggs!
To make one:

Cut two birdhouses at 5.5 inches, decorate as desired (one for each side of the basket)

Cut a strip of coordinating cardstock at 6 3/4 inch.  Score at 1/2 inch from each of the long sides and
 2 1/2 from each of the short sides.  Snip the lines that I have marked in brown (at the 2 1/2 lines up to the 1/2 inch line).  This will give you 3 tabs to attach to each birdhouse.  I would start with the center tab marked A attached to the bottom of  one of you  birdhouses, then put "B" on along the sides
following the angle of the birdhouse.


Glue your second birdhouse on to the back of your basket, tabs are already in the right places since they are identical to the front.

Attach some kind of handle if you wish - I used a 3/4 inch strip of the same cardstock attached with ribbon (punch holes in handle and side, tie ribbon with a knot, put tails through the holes, tie another knot) , but you could also use brads, just use a ribbon, or even leave it without a handle. 

And, of course - fill with something cute and yummy!

Thanks for looking, happy cutting!

Thursday, March 22, 2012

Simple Easter Egg banner


I totally lifted this banner from www.creationsbykara.com.  I love how simple it was to make and I will definitely make some similar ones for other holidays.  I cut the eggs with my cricut, cut two of each color, fold the top one in half so it stands out.  To attach the top egg to the bottom egg I used a straight stitch then just used sticky tape to attach them to the actual banner.  If you stitch them directly to the banner, you will have strings, but if you stitch the eggs only you can tuck the strings behind the egg.   The banners are made from a book page and they are so thin that I just stacked them and cut all 6 by hand at the same time.   To attach the pages to the the string, I just folded over the top at about 1/2 inch and taped the very edge (so they make a loop that will still slide along the twine).   I wanted my candles to match so I wrapped them with paper as well (they are flameless) and added a flower from cake basics cartridge.   Thanks for looking!