Showing posts with label Gift Ideas. Show all posts

Sunday, January 29, 2012

Lacy Labels Heart shaped box and cholate candy magnets


This weeks project on splitcoaststampers was a heart shaped box.  They used some spellbinders, which I don't have, but any heart shape from any cart will do.  I used the heart on Lacy Labels.  For the base I used the heart at 4 inch (shadow), for the lid I used the heart at 4, both shadow and reg for layering.    For the "box" I used the heart (reg) at 3 inch on the base, 3 inch (shadow) for the lid.  I wanted the flourish on top to sit inside a bit so I cut it at 3.25 inch and the rose is from my rolling rose post.  I skipped the hinged part of the splitcoast tutorial and did a modified version so that both top and bottom of mine have the heart box (if you do it that way, be sure to use the shadow on the upper part so it fits over the bottom part).  If  you need further explanation, let me know.   For the inside....this is my favorite part....I made little chocolates out of fimo clay. I pitted the bottom to hold a magnet (do that before you bake them..push the magnet into the clay, take out the magnet, bake, then glue the magnet in the hole) and then put them in some Wilton candy wrappers-so these are fridge magnets but they look good enough to eat!  Thanks for looking.

Wednesday, December 28, 2011

Our first Cricut cake and some more shopping bags to share

The cricut cake was recently on sale for $59.95 and free ship - too good a deal to pass up for this cake loving family.  The boys and I made out first one for Christmas.  We made marshmallow fondant (we found the recipe on the internet, it was pretty easy to make).  We cut the shapes from Christmas Cheer.  The boys went a little crazy on the sprinkles.  Yeah, we need a bit of practice, but the cake was still yummy. 

My big holiday projects were personalized 100% cotton shopping bags.  I bought a bunch of blank ones from a friend (she works at a print screening place).  They are nice quality bags  and a good size for groceries or whatever.  I used contact paper to make stencils then used acrylic paint (2 parts acrylic paint, one part fabric treatment which is sold in the acrylic paint section).  I was not super happy with the way the acrylic paint, I definitely like the iron on vinyl better, but the cost difference is BIG.  If I would have done vinyl, the bags would have just been too pricey.  
For a friend using lacy labels and wall decor
For Grandma using lacy labels and some purchased flowers attached with fabric glue

More traditional grocery bags:


 I still have some left so I'm going to try doing them with cut fabric and see if that works better - I'll let you know.

Made by Andy for his grandma

Thursday, December 22, 2011

Altered Altoid tin gift card holder

Did you know that Altoids tins are the same size as gift cards?  They make great little holders for them and are fun to alter.  I made this one for my MIL for Christmas (and so I could enter the Cooking with the Cricut holiday floral challenge).   is at 2 inch from Joys of the season, the label is from Lacy labels (1.75 inch outside, 1.5 inch inside), paper is echo park and stamps are Stampin Up.

The tins have writing on the sides, but you can easily cover with a small strip of coordinating paper,  ribbon, or sand it off.
***One little note***  They really are the perfect size for the gift cards, but no room to get your fingers in to grab the card.  Be sure to tie a ribbon around your gift card so the recipient can have some way to pull it out - looks prettier that way anyway!

Friday, December 16, 2011

Hand Sanitizer 4 pack gift and tutorial

I wanted to dress up some hand sanitizers for the teacher with a cute little pack.  I sat down at my crafting table come up with some cleaver cutting file, but then realized that the best size is 12 inch and the quickest and easiest method doesn't require a cricut, just a paper cutter and scoring tool, so no free file today but I do have a tutorial.   You can make 2 from one 12 x 12 and the hand sanitizers are 5 for $5 at Bath and Body Works.  For mine I used Echo Park paper, label from Lacy labels (at 1 inch) and poinsettia from Woodland at 1.25 inch, stamp in PaperTreyInk.

Here's how you make them....
From cardstock or double sided designed paper, cut one 12 x 2 3/4 inch strip and two 1 x 6 3/4 inch strips

Score larger piece at 1 1/4, 2 1/4 and 6 inch from each end
fold to make and a frame

score smaller pieces at 1 and 2 inch from each end
fold to make belly band, secure along front and back tabs with adhesive

Holds 4 sanitizers
Now adhere two sides together.  Use a punch of choice (I used the small SU oval, but three small circles in a row would work great too, or even a snowflake) to create a handle at the top and decorate.  How simple is that!

Friday, December 9, 2011

Christmas pencil holder stocking stuffers

Each little box holds 3 pencils,  and 3 boxes can be cut from one 12 x 12 paper.  The eraser is just on the tag with a single sticky dot.   File includes tag and is the freebie until my next post.

PSI_Pencilbox svg

Wednesday, December 7, 2011

Seasons Greetings Poinsettia card and dolphin shopping bag

Oh my, is it the 7th already?  I need to get cracking on some cards.  Normally we do the photos for our bulk cards but this year we are doing regular cards and I just can't bare to go buy them when I have so many toys.  I didn't know we weren't doing photos until Monday, so now I need to make a lot in a short time, I'll have to keep 'em fairly simple.  I made 5 of the poinsettia ones this morning already.  5 is about my limit before I get bored with a design.  I used Christmas noel for the flower flourish (cut at 2.75 inch) and an SU stamp. I inked the flowers with a light brown to accent the lines and edges and put the second layer on pop dots.

I also got one more bag done.  This one is for my SIL, I used life's a beach for the dolphin and Wall decor and more for the waves and monogram.  Thanks for looking!

Friday, June 3, 2011

Pirate-y Piggy bank block


I went to Oregon last week, and as usual I stopped and my two favorite crafting places: Craft Warehouse and Ikea.  The glass blocks were half off  (on sale for $4) so I pick up two, one for each son.  They are pre-drilled  with a two inch hole on the top, so that is what I'm using to put money in and out (this is for saving, so mostly in).  For the front I used black vinyl, then white for words and skull.  I used Pieces of Eight font - my favorite for pirate-y type things.  I wanted to write Carstens treasure, but then the letters were just too small.  One the back I just used a square of chalkboard vinyl so he can either keep track of what is inside, or write what he's saving it for.  Tomorrow I need to make one with a snake for my other son.  Thanks for looking!

This I just had to take a picture of at ikea - it made me laugh that they had to put "not acutal size"

Monday, May 9, 2011

Last two Pink Stamper Challenges DONE!


HA! I did all 12, Here is  my scrapbook page, border element from Paper lace, altered in DS, and the journal label is from Storybook.

And my final project is something summer themed, so I made an end of the year gift card holder for a teacher.  The gift card holder was done with Cindy Loo, stamp/punch is Stampin UP.

Sunday, May 8, 2011

More Challenge projects

Well the day is almost over and I haven't finished all 12 challenges over at The Pink Stamper, but I did get 5 so far.  I posted the first two I did and here are the next three:

Challenge one:  Something cupcake themed, I used DCWV, SU, and Cordinations papers.  I cut the cupcake from Straight from the nest.  The first time I did 2.5 inch, it was too small, so I did 3.5 inch and used the little one inside.

Next, Challenge is something "kid".  I made some little pencle toppers.  All cut at 1.25 inch, flower and butterfly from SFTN, plane is from United we stand, and snake is from Animal kingdom (Andy is really into snakes right now).
And the last item I did was a pet scrappage (Challenge 10)


Sunday, November 28, 2010

Paper Pinecone Ornaments for your tree


My friend showed me how to make these last year and I just love them.  They are nice and lightweight and have that great paper feel (paper lovers will know what I mean).  I had two on my tree last year, but this year I thought I would make a few more so I could just put them out in a bowl.  They also make a lovely gift!  Here's how you make them....
Supplies: Styrofoam eggs (the bigger kind work best, like 3 inch)
              One sheet of 12x12 paper or even better, some wrapping paper
              a LOT of pins (you can buy a big container at the dollar store, does several)
              ribbon

Start by cutting your paper into 1 x 2 inch strips and then folding over two corners to make a point.  Make a big pile of these.

Next put 4 of your folded papers on, with points to the point of the egg, pin as close to the end of the point as you can.
Now start layering, pining each piece at the back two corners. 


If you are going to hang this, then stop about 3/4 of the way up and pin in a loop of ribbon, put pins at the base of ribbon and more at the top of egg to and keep it in place.

 Pin more papers until you get to the top of egg.  On the smaller (2 1/2 inch) eggs I had to modify the papers a bit at the very top (use 1x1s instead  of 1 x 2's or just fold over overlapping)

Add a bow at the top, you can just pin it in place, and your done! 

Friday, October 29, 2010

And a couple more tiles done with my cricut


Just a few more, I promise, then I'll move on (I have the scrapping bug but I have to get some of these done for a small in home craft show).  So the first is done with lacy labels and Straight from the nest and the second is lacy labels and Joys of the Season.  Thanks for looking!   And buy the way, oh my crafts has their vinyl on sale right now, super good price and free ship if you spend $50  A few other items may have slipped into my cart while I was buying vinyl, so you can bet I hit the free ship, be sure to check out their cuttlebug sale too!

Tuesday, October 26, 2010

Give Thanks and BELIEVE gift tiles

Todays tile was Thanksgiving themed.  The font is Champignon and is just beautiful, you can download it from on dafont.com.  The wheat I drew in inkscape.  I also have a Christmas one I did yesterday, the font is from Winter Wonderland and the sleigh is from Christmas.  These are both 6x6 tiles.  I see on another tile that someone asked how to drill the holes.  There is a special bit you buy for your drill for ceramic tiles-I bought mine at Lowes for $10ish, just snap it into your drill and away you go!

Monday, October 25, 2010

Stocking Feet Only Please holiday tile

Here is my Sunday tile (I'm making a different one each day).  Its done with Christmas Cheer (stocking, card function, with the fold marks hidden in DS), and Storybook.  We used red sticky strip and diamond dust around the outside.  This was made for my friend to remind her holiday guests not to wear shoes in her house, but I think we will make more of the same one (one for me too!) as soon as I get some more red vinyl.   I love that you can use the actual card function to make a matching gift card, how cute is that!  Thanks for looking!

Saturday, October 23, 2010

A couple Christmas tiles with Winter Wonderland, Noel, and SCAL


Here are a couple Christmas tiles I made - they are just the beginning so if you t are wanting to make some for gifts, stay tuned.  The first one was done with SCAL for the words and the mistletoe is from the Christmas solutions cartridge (cut at 2 1/4 inch).  The second one was done with the wreath from Christmas (Blackout, 4 inch), the berries (4 inch, layers, shift sleigh), and the joy (2 inch) are from Winter Wonderland.  The tile is 6x6 and I drilled a hole before adding the vinyl so the ribbon could be used to hang it.  Thanks for looking!

Tuesday, September 28, 2010

Matchbook Calendars for 2011

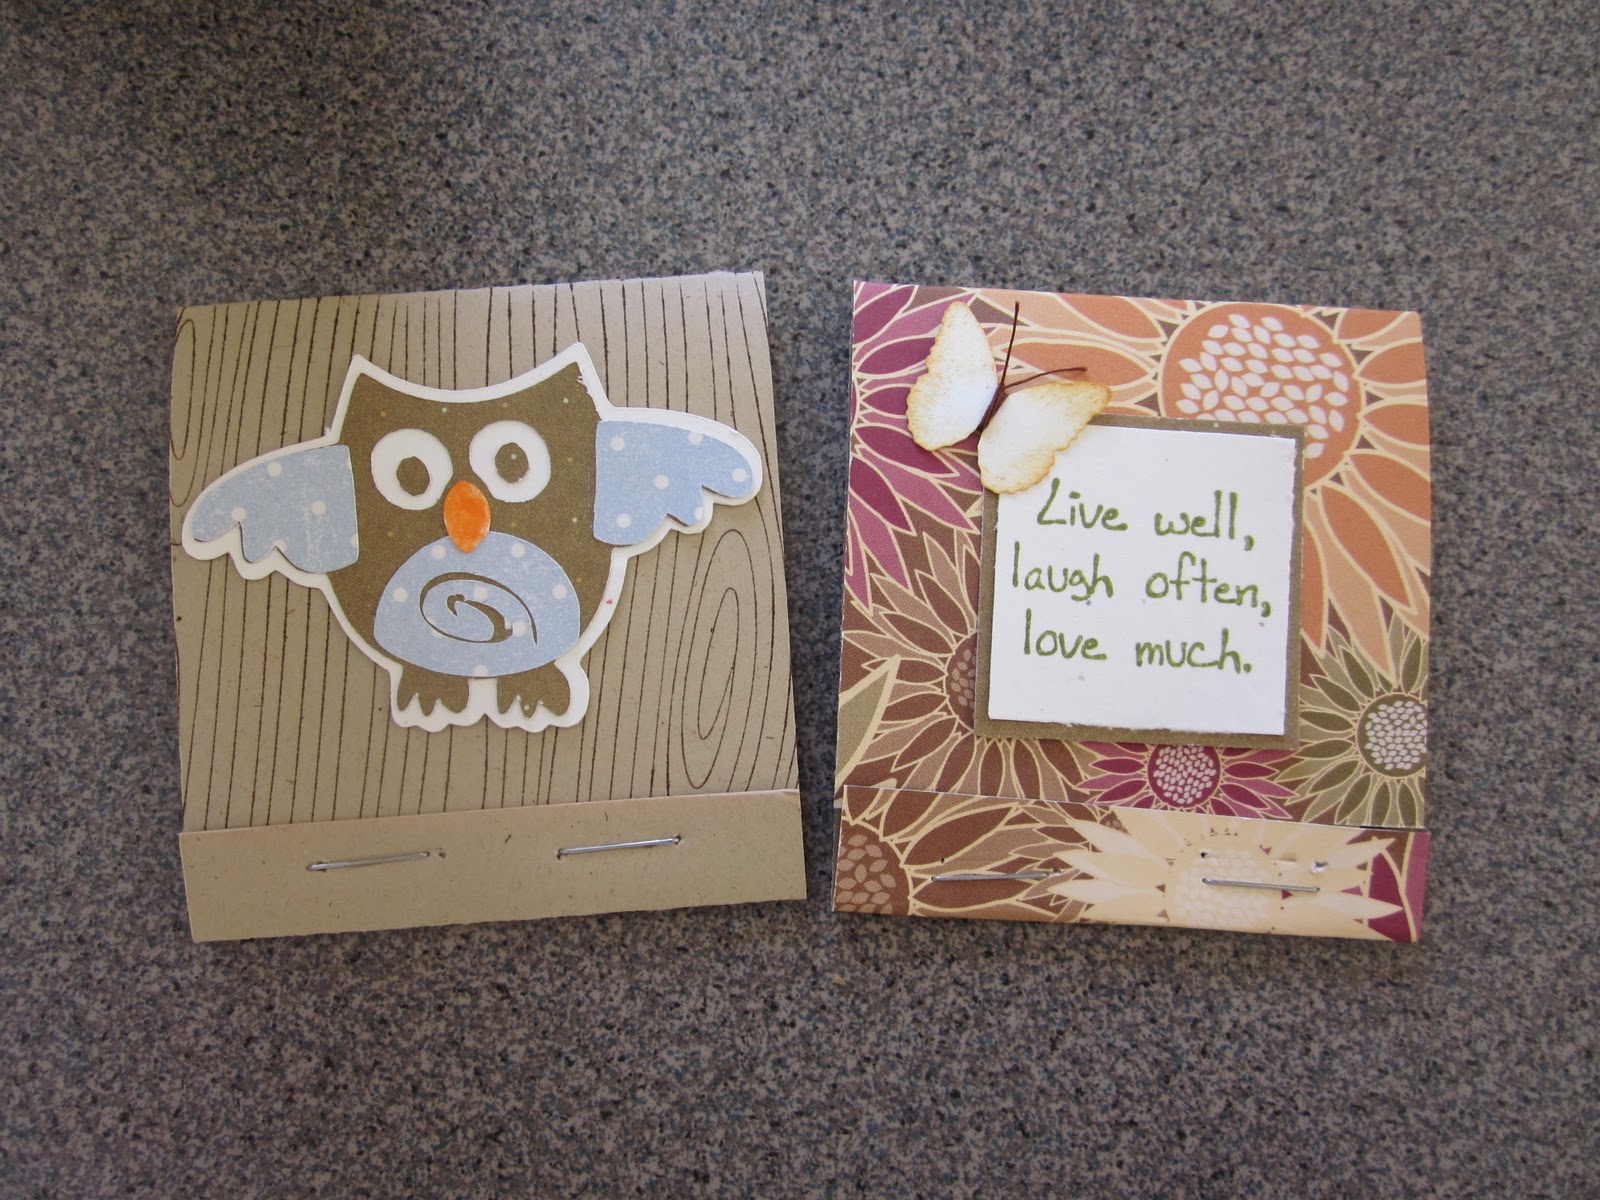
I have had a couple requests today for 2011 matchbook calendars, just so happens that I have been working on that very thing!  I've done these for a couple years, you can find my original post and instruction for doing a hodgepodge way HERE  For this year, I'm making a quick project even quicker by using staples.  I've included very faint lines on the calendar template for cutting, the final size of the calendar will be 2 by 2.5 inches.  So here is my new quickie method: 


Print PDF and cut on lines, stack calendar.
Cut cardstock or double sided paper to 5 1/2 by 2 1/2 inches, score at 1/2 inch
Put calender into 1/2 inch pocket and staple at about 1/4 inch 
Fold over top so that it catches in the lip, then crease the end

Now, you may be asking, why not just score the second fold....well, every time I try I end up with it too short to catch in the lip, or too long so that it buckles.  Apparently I am score-challenged and this is the best way to insure (at least for me) that it gets creased in the right spot.  The owl is cut from Straight from the nest at 1.5 inches, stamps are Stampin Up.  Thanks for looking and for taking the time to comment, file for calender is below.

PSI_2011Calendar.pdf

Friday, September 17, 2010

Tea and Tissue Get Well Gift Pack

I saw one of these on the internet that was done last year and thought it was so cute.  I can't seem to find a blog for her but her how to video is HERE. She used a full sheet of cardstock (which I am stingy with), and involved some scoring and measuring (neither of which I am great with), so I made a quickie/less paper version of her project.  Thanks for looking.