Tuesday, January 4, 2011

Cindy Loo and Lacy Lables friend card

Today's share is a card done with Cindy Loo and Lacy Labels - the Doily is from CL is cut at 4 inch, the friend and the inside(2.5inch)/outside (4inch) frames from LL.  The stamp is a new stamp I got from stampin up - well actually its an old retired stamp but new to me.  I answered an ad on the craiglist the other day for some older stamps.  The gal lived about 1/2 hr away from me but happened to be coming to my neighborhood for a football party.  So there we were in the parking lot of the local mini-mark, pitch dark out, about 20 degrees out, two women  digging through the trunk of her mini-van-going through stamps. It makes me laugh still to think about how it looked- like the stampers version of some other kind of "deal".   Anyway, I like this set because of the verse: May today be a happy memory with the promise of many beautiful tomorrows - which is stamped inside.

Here are my Christmas Thank you cards:


I actually made a bunch of the snowflakes back in Early Dec, so I can't remember what size I cut or even what cart - I think Christmas Solutions.  I ran them through the xyron and covered them with dazzling diamonds (if your making one, why not make 20!).   Having them all ready ahead of time made assembling thank you cards a breeze -I should make up embellishments ahead of time more often.  They are very simple but with the glitter, pop dots and sparkly centers they are still fun in person.   Thanks for looking!

Sunday, January 2, 2011

Todays little project - Chair makeover

This is not my normal cricut project, but I thought I would share anyway.  My mother had this chair in her garage in the going, going, going pile.  She's had it forever and it had seen better days-ripped seat and drips of paint all over.  I love the little flower on the back though, so I snagged it and thought I'd fix it up a bit.  I sanded it down - mostly. I left some of the dark on the edges and creases (see photo 2), partly because I was going for a shabby chic-distressed look, and partly because I was sanding outside in the FREEZING cold and wanted to hurry inside to thaw.  Then I put on a layer of Minwax stain and finish.  I tore off the old seat cover only to find another underneath - I guess I wasn't the first one to redo it.  I stapled on the new fabric, screwed the seat back on and POOF - fabulous new chair.  I started about 3 and had it done and back in the house by 6, not to bad.   Thanks for looking!

The edges are left with the old stain
Chair before :

Saturday, January 1, 2011

Happy New Year! First scrap page of the new year....

Hope you all had a great first day of 2011!  I don't think I got all the scrap pages done that I meant to for 2010.  Hopefully this year will go better.  Here is my first scraplift of the new year.  I got the layout from this months Scrapbooks Etc. and the supplies are from EchoPark (Wintertime collection).   Thanks for looking!

Tuesday, December 28, 2010

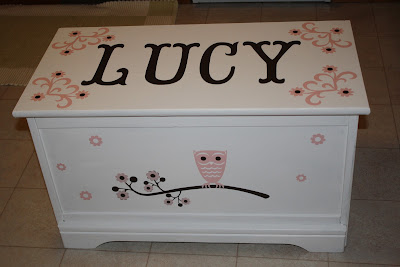
A toybox for Lucy


A few years ago I bought a toybox at a garage sale.  It had a bad green paint job but I liked the shape and size and just knew someday I would need it.   My good friends sister just had a little girl and we decided it was time to fix up that box and make it super cute.  We started by painting it white, then came the vinyl!  I used Storybook font for her name at 8 inches in brown vinyl, then did corner flourishes at 6 inches (also storybook).  Next we did a branch (Straight from the nest, 4.75 inch) and an owl (Storybook, 4.75 inch) for the front.  For the sides we did the deer and squirrel from Cindy Loo (both at 7 inch).  I vinyl I used was cricut brown, quickcutz baby pink, and stampin up pretty in pink (on the deer).   I wish I could find the original photo of the box before painting, its an amazing difference.  I soooo hope Lucy's mommy likes it. 

Thursday, December 16, 2010

10 years ago today.....

Happy Anniversary Carl, I love you!
                                       

Tuesday, December 7, 2010

Christmas Cheer Stockings for dinner silverware...and more cards


These little stockings are to put on each plate for Christmas dinner.  They are from Christmas cheer, cut at 9 inch.  I did them in DS so that I could get two sides on one 12 x 12 and so I could "hide conture" on the toe and heal lines.  If you want to use my file I will attach it below.  You could do it without ds too, but you might want to use the blackout function or your silverware will come out the heal slit.  I tried stitching them on the first one, but decided that was way too much work for a one night use, so I ended up just using my atg gun around the very edges.  There is enough room for napkin, knife, fork and spoon, and even a little dinner mint in the toe!  I used lucia handwriting for the names (you can cut names, or just print them from the computer), except for the kids, they wanted to write their own names : )
table stockings DS file

And here are a few "quickie" cards....there is glitter on all the little rooftops, even though you can't see it from the photo, and the poinsettia is from Season of Joy, cut at 2 1/4.


Saturday, December 4, 2010

Several Cards and a dove svg


Of all the cards....my least favorite to make is Christmas cards (ok, maybe next to simpathy cards).  I don't like doing them because there is just too much other stuff to do.  Now if I could make them throughout the year they would be fun to make but...well that would just be too organized.  Here are 4 styles I made over the past 2 day.  Two are done with SU stamps (the Christmas collage stamps are part of a digital set you can buy for $5), the candy cane card is from Christmas cheer, words at 1.25 and candy at 4.  The dove was done in inkscape/SCAL and I'm attaching that file below.  Thanks for looking!
Dove SVG

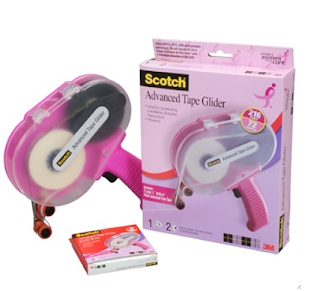
On a side note,  Joy over at Obsessed with Scrapbooking is giving away two pink atg guns, hop over and enter for a chance to win!